updated vim screenshot with some explanations part one
howdy all
i have been away from a while battling dragons and you know…. that whole work thing.
one question that i do keep getting on pissedoffadmins is about the vim screenshot and the rc file that i use. in this article i am going to explain some of the real big things in my rc file.
lets start the show
click to enlarge
and as of this writing, here is the .vimrc file
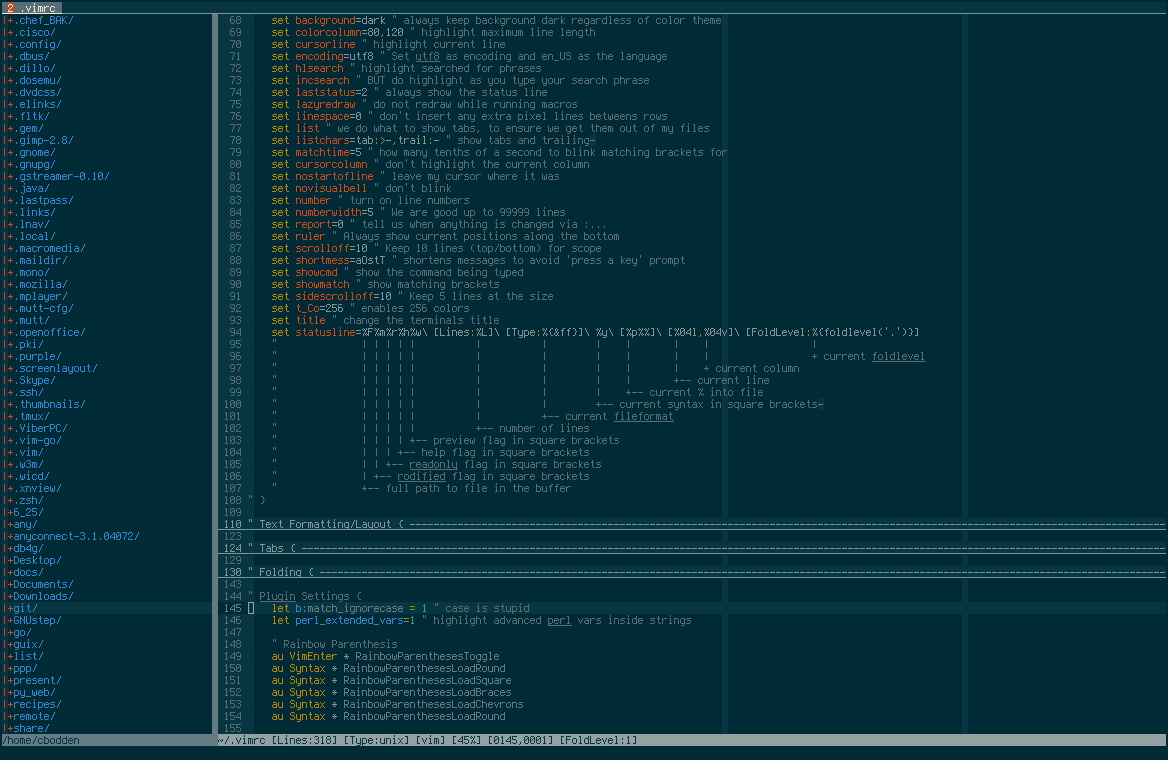
so lets start with the screenshot.
tabs
at the top we have a tab that says “2 .vimrc” — that is controlled in the vimrc file linked above in lines 124-128
line 126 – this makes that line permanently show up and since we have nerdtree (explained later in this article) it will show the number 2 since 2 windows are active right now
line 127 – this states that a maximum of 10 tabs can be opened at startup but you can have as many as you want (remember sanity though).
windows
the main chunk of the screenshot, you will notice that there are two panes. this is using NerdTree
the left pane is automatically opened whenever any file is edited due to lines 186-189
the right pane is just editing the vimrc file itself
switching between panes is done with either:
ctrl f ctrl f
or clicking the pane with the mouse in line 42 of the vimrc file
status bar
in the status bar you will see that underneath the file listing (nerdtree) it gives my home dir. pretty standard.
but underneath the main pane it gets more complex. this is set in lines 94-107 although its actually line 94 with 95-107 being descriptions for clarity.
color scheme
you will notice that i use solarized dark which is set in line 67 and imported from github.
i like solarized dark since its the same scheme i use in all my terminals. its nice on the eyes and i think its sexy as hell.
more to come soon
Leave a Reply